1
 Begin with a new document. You can either use a photo, or create one yourself. In this case it’s just a blue gradient.

|
2
 Choose the polygon lasso tool. Hold down your mouse on the lasso tool to reveal the polygon one.
3
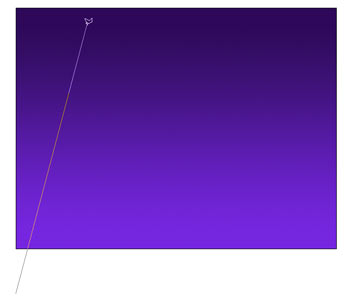 This tool doesn’t work with dragging. To work the Polygon Lasso, you click at the origin. As you move your cursor, a line will follow it (Kind of like gum on the sole of your shoe.). Click again to create a line.
Tip: To quit dragging gum press the esc key.
4
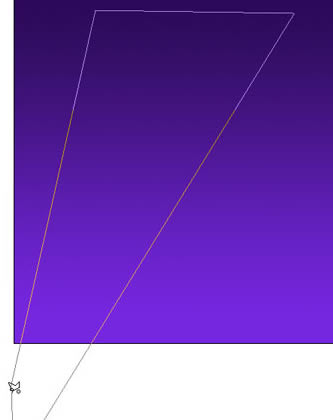 Keep clicking in the shape of a triangle (sort of). To complete the selection, hover your mouse over the origin (The first place you clicked). You will see little circle. This circle means that you will complete the selection if you click on the start point. Do it!
5
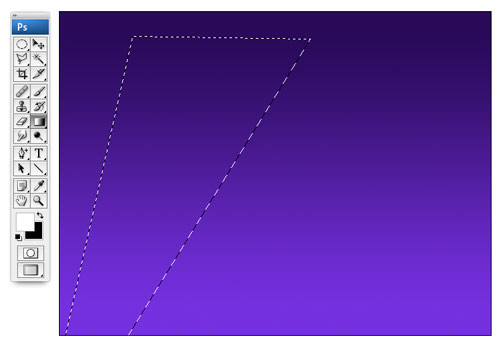 As soon as you click on the start point, you will notice the marching ants selection (and the gum isn’t stuck to your shoe anymore).
Now, we are ready to fill with color. Press the D key to reset the Foreground/Background colors.
Press the x key to swap the color. White is now the foreground color.
(You could just choose white as the foreground color and avoid all the shortcuts, but it’s good to learn them right?)
6
 Choose the Gradient tool. Go to the options bar at the top and choose 2 things.
1. Click the gradient to open the options, select the foreground to transparent option as shown.
2. Make sure that you choose the linear gradient option.
Finally, make sure that the transparent option is turned on in the options bar at the top and reverse is off.
7
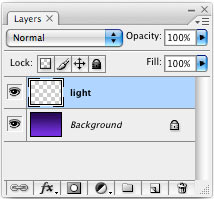 Wait! One more thing. Create a new layer and select it, so we don’t add pixels to the background.
8
 Click at the bottom of the selection. Drag the gradient along the selection, but not past the selection.
9
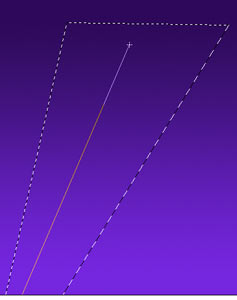
 Release the mouse and you now have a gradient. Turn off the selection by pressing ctrl/cmd+D or clicking away with the selection tool.
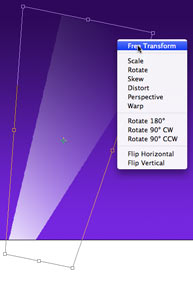
To change the shape, press Ctrl/Cmd+T for the free transform tool. Right click for additional options such as perspective. Change the shape to suit your needs by dragging any of the little squares (adjustment handles).
10
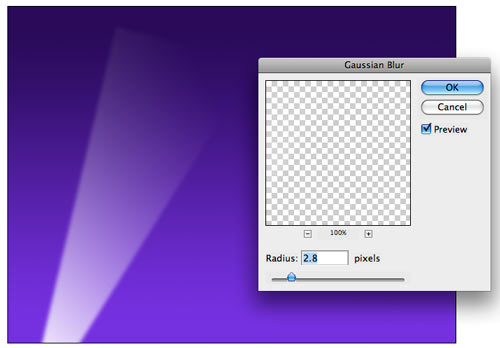 We now have a spotlight, but it lacks realism because the beams have hard edges. To soften the beams, choose Filter>Blur>Gaussian Blur. Enter a setting o suit your needs and click OK.
11
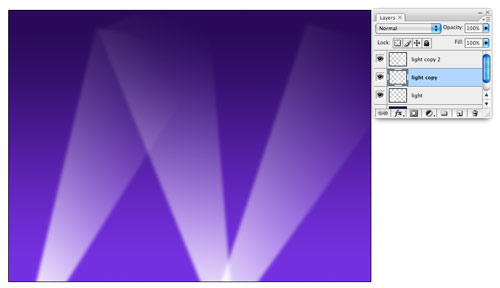 To add more beams, Duplicate the layers and use free transform to change the angles.
12
 Here I added the word Hollywood, so that you can see the transparency effects.
13
 Try adding the effect to different backgrounds. In this picture I made some stars and added the spotlight. This shows the gradients off really well. You can drop the opacity if you want to lesson the effect.
wrap up
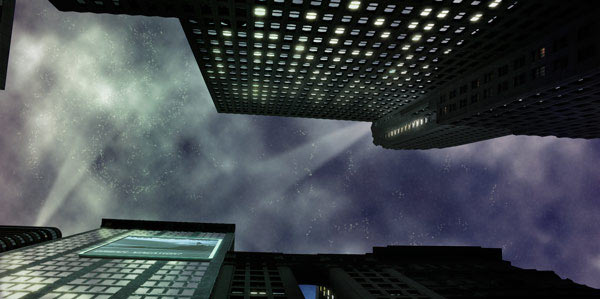
Don’t forget, you don’t have to use this effect for vertical spotlights. Here is a futuristic cityscape I have been working on. Notice the effect in the sky.
I hope you enjoyed this tutorial. See you at the CAFE
Comments
Powered by Facebook Comments
